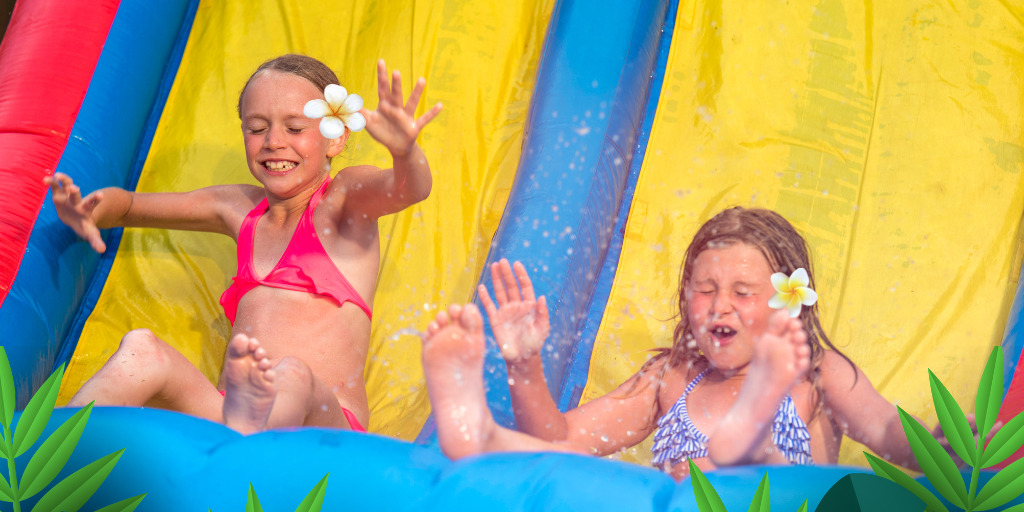
The heat of summer always finds a way to sneak up on us, even when the calendar says early June. Kids drift toward water as if a magnet is hidden in the tiles, and grownups chase shade, snacks, and a few quiet minutes that feel like a small vacation. A DIY splash pad at home becomes a practical, affordable solution that turns a yard or driveway into a playful oasis without the commitment or cost of a commercial water park. Over the years I’ve built two versions, both different in scale and approach, and learned a few tricks that keep the project simple, safe, and actually fun for long stretches of a hot day.
A splash pad is more than a sprinkle of toys and a hose. It’s a carefully arranged surface that delivers water where it’s needed, without creating puddles that breed mud or slip hazards. It’s about choosing materials that hold up to sun, traffic, and the occasional spill of juice or sunscreen, while still feeling inviting to little feet and the occasional barefoot adult. It’s also about balance—between cost and durability, between ease of installation and the longevity of the setup, between a one-day project and a system that can grow with your family’s needs.
In my early attempts, I learned by trial and error, which is the honest best teacher in a project like this. I started with a cheap, preformed kiddie pool repurposed as a splash zone. It was cute, sure, but not ideal for more than a couple of hours if you wanted to position kids for maximum splash action without chasing after leaking seams or unstable edges. Then I moved to a more modular approach: a combination of a low-profile splash base, a grid of water outlets, and a simple filtration/recirculation idea that kept the water moving without constant refills. The improvements weren’t glamorous, but they made a real difference in safety and reliability, and they kept the project in the “budget friendly” lane.
If you’re thinking about a DIY water park at home, here’s a guided way to approach it. We’ll cover the key decisions, the practical steps, and the fine-grained details that often trip people up when they’re trying to do this on a weekend with a couple of kids in tow.
First, set clear goals for your space. How big is the area you can devote to this project? Do you want a pad that’s purely for the toddler years, or a system that’ll entertain teens and adults with longer, higher-energy sessions? The answers matter because they guide the layout, the materials list, and the maintenance plan. A rough target is to create a space that can be resurfaced to keep it safe, with a modest but reliable splash action. If you’re working in a shaded yard or a driveway that gets the afternoon sun, you’ll want to think about sun resistance, durability of the surface, and a way to drain water away from critical spaces like the house foundation or the edge of a fence line.
Choosing the surface and footprint is the most fundamental design decision. The surface should be non-slip when wet, but not so rough that it grinds bare feet over hours of play. Concrete is durable but unforgiving; it can be safe with a thick, cushioned mat layer but adds cost and complexity. A poured-in-place rubber surface or a thick, high-density foam mat can be ideal for a compact area, but you’ll want to ensure chemical safety, especially if kids are prone to gnaw on their toys or fingers. Another approach is a grid of interlocking foam tiles topped with a textured, water-friendly coating. You get a cushier feel underfoot and the option to replace damaged tiles rather than redoing the whole pad.
The water delivery system is where the magic lives, but it’s also where most people get tangled in the weeds. A splash pad needs water pressure that is gentle enough not to push kids around but steady enough to create a pleasing spray pattern. The simplest starting point is a standard outdoor hose fed through a few adjustable spray nozzles that you can place around the pad like little water sprinklers. If you want fewer hoses underfoot and a more uniform mist, you can install a low-pressure manifold with a small circulation pump. The trick is to avoid creating a pond-like sink where water accumulates and becomes a magnet for dirt and debris. A well-planned drainage strategy matters. A pad that drains slowly can turn into a muddy, slippery mess that defeats the purpose of a safe, clean play zone.
Maintenance is not glamorous, but it is the backbone of a long-lasting setup. You’ll want to rinse the pad after heavy use to cut down on sunscreen and sand, and you should filter or treat the water periodically to avoid algae. A simple, portable filter cartridge helps, and a weekly sweep of the surface with a stiff brush keeps the grip intact. If you’re using a recirculating system, inspect hoses and clamps before and after the season. Check the power supply for the pump and make sure there’s a dedicated outlet with a GFCI, especially if the pad sits near a pool, a hose, or a wet area. A few minutes of preventive care can save you hours of cleanup and replacement later on.
The budget, of course, looms large. The beauty of a DIY splash pad is that you can put together something that feels substantial without breaking the bank. In my latest version I aimed for a total cost under six hundred dollars, including a basic pump, tubing, and materials for the surface. It’s not the tiniest project you could imagine, but it’s a tangible, lasting improvement that pays for itself in reduced drive-time to a public pool, not to mention the hours of family time and the sense of competent, hands-on achievement. Costs can swing, but the logic stays simple: invest in a durable surface you can clean easily, select a water delivery system that minimizes waste and maintenance, and plan for replacement parts that last through several summers.
I want to share a practical narrative of getting from idea to finished splash pad, frame by frame, so you have a solid mental map for your own setup. The process starts with a clear plan, and it ends with a test run that convinces the whole family this space is here to stay.
The planning phase is all about the layout and the safety net. You’ll want a perimeter that is clearly defined, perhaps a low hedge, planters, or simply a painted edge on a concrete slab. The kids should be able to move around without stepping into water that’s too deep or too electrically complicated. I’ve found that placing the main water outlets in a loose arc around the center works well for a cluster of kids who want to chase the spray from different angles. If you have a slope, plan to keep the waterlines at the highest point of the pad so you have a natural sink for the flow, and you can rely on gravity to help with drainage to a nearby drainage trench or a garden bed.
The surface choice follows from the plan. A modular, slip-resistant rubber tile is the sweetest deal for a driveway conversion. It’s forgiving, easy to clean, and you can replace a tile that starts to show wear without pulling up the entire pad. If you go with a foam tile system, you’ll want to seal the seams with a flexible, water-safe adhesive that provides a continuous surface rather than a bumpy mosaic. Both options work if you’re deliberate about sealing edges and addressing any trip hazards created by the seam between tiles. In one summer I discovered that even a well-sealed surface can collect sand and debris, which not only looks bad but can create small abrasive grains that irritate tender feet. A plan to sweep between water sessions simplifies this.
The water delivery design is where you decide how the pad feels to interact with water. My first attempt used a handful of sprinkler heads that ran off a single garden hose. It was a straightforward approach, and the kids loved it, but after a few weeks I noticed the spray pattern drifted as the hose temperature rose, and the water pressure ebbed. The second approach introduced a tiny circulation pump connected to a low-pressure manifold. It created a gentle, even spray and reduced water waste because the system recirculated and only topped off the real loss from evaporation and splash. If you’re in a climate with frequent hot spells, a recirculating setup also reduces the number of times you need to refill the water. The trade-off is more equipment to maintain and a slightly larger upfront cost, but the benefit is a more consistent experience and less waste.
A key detail is the safety of water outlets. Keep outlets at leg height or slightly above so kids do not crouch into boiling-hot pipe elbows or cups that can pinch a fingertip. Use flexible tubing that holds up when kids pull it or step on it. If you decide to include a small fountain or a central spray feature, ensure there is a safe distance between the feature and the edges of the pad, so it doesn’t create a sudden, slippery convergence point. A cautious approach here is essential because a splash pad thrives on movement and laughter, and the last thing you want is a misstep turning a sunny afternoon into a scraped knee.
Now and then you’ll encounter edge cases that force a pause for reassessment. For instance, if you live in a windy area, the spray pattern can be unpredictable, which may undermine the balance of water across the pad and cause zones to be too saturated. The fix is simple once you see it: distribute outlets evenly and test the flow with a few children present to observe how the spray travels in practice. If you notice the water bombing the shoulders and chest area of a standing toddler, adjust the height and angle of the heads to push the spray toward the ground rather than in the face. Likewise, if a corner remains unusually dry, you can temporarily place a small wand sprinkler to create a more uniform distribution while you evaluate the longer-term configuration.
The social and practical angle is always worth considering. A splash pad is an invitation to collaboration—the kind of space where siblings negotiate turns at the sprinkler head, where neighbors wander by with a cold drink and a new play idea, where you, as a parent or caregiver, learn the limits of your own patience and set boundaries that keep play safe and joyful. The most successful setups I’ve observed or built are those that are easy to fix, simple to maintain, and forgiving when the weather turns unexpectedly hot or the kids switch gears from water games to hide-and-seek and back again.
If you’re ready to dive in, here are two short, practical lists to guide the initial phase without turning this into a weekend-long scavenger hunt or a whiteboard meeting for the project team.
- Inventory and shopping essentials (quick checklist) A durable, slip-resistant pad surface, large enough for your space and age range of the kids A low-pressure water delivery system or a small circulation pump with a manifold A length of flexible tubing, hose connectors, and basic clamps A simple filtration or water treatment option that is kid-friendly A drain solution that safely channels water away from the house and onto a garden or yard bed Setup and safety quick-start steps Clear the chosen area and lay out the pad or surface first to visualize footprint Install the water outlets and test flow with the pad dry to avoid splashes on hard surfaces Connect the pump and run a brief test to confirm coverage and gentle spray Check drainage routes and ensure there is no water pooling anywhere near the foundation Add age-appropriate rules for play and set a routine for cleaning and water replacement
The endgame is a space that is welcoming, safe, and dynamic. A successful DIY splash pad has a sense of place that belongs to the household, a place where you can see the kids’ faces light up as they discover a new spray pattern or chase a circle of mist that wafts across the concrete. It’s not about recreating a water park down to the last detail; it’s about creating a micro-environment that fosters curiosity, movement, and a little healthy competition in a controlled, homegrown package.
Throughout the season I’ve found it valuable to document what works and what doesn’t. A few seasons into my latest build, I can offer concrete numbers and practical benchmarks that might help you plan your own project. The pad itself measures roughly eight by ten feet, which feels like enough space for three or four kids to move without stepping on each other or trampling over a central water feature. The surface is a textured rubber tile that’s ideally around half an inch thick with a grout system that allows easy replacement of worn tiles. The central pump is a small, outdoor-rated unit that draws from a standard garden outlet and runs on a simple timer for controlled sessions. The spray heads are adjustable and positioned in a loose arc, giving a sense of motion as kids flip from one side to the other.
Kids learn to negotiate space, not simply to get wet but to co-create a splash effect that works for everyone. The older child learns to tilt their body to ride a sprayline and balance on the soft surface while the younger siblings chase the mist as it rides the breeze. It becomes a stage for social play as much as a source of cool relief. The difference between a good splash pad and a great one lies in how often it is used, how well it is maintained, and how much time you invest in making it feel like a natural extension of the house rather than a weekend project with a temporary footprint.
There are trade-offs that deserve explicit attention. If you prioritize ultra-low maintenance, you may choose a simpler surface and a single, fixed spray head. That approach keeps costs and complexity low but can produce a more predictable spray pattern that some kids will outgrow quickly. If your family includes teens who want higher energy play, you may decide to add a fountain feature or a higher-flow nozzle set. The extra water and power demand are the price of a livelier experience, and you’ll want to balance that against municipal water budgets, drought conditions, and the terms of your utility plan. It’s a personal calculus, but the joy of a home-made water park is that you can tune it to your family’s rhythms.
Another practical point concerns the seasonality of use. In hot, humid climates, you’ll likely want to keep a can of cooling towels and a supply of shade nearby, because even with a pad designed for outdoor use, too much sun exposure can be exhausting in the middle of a long water session. Consider adding a shade sail or a pop-up tent to create a cool zone where kids can rest and rehydrate. A small bench or a few chairs help the adults stay close without hovering, giving you a chance to observe and adjust the flow, the play patterns, and the safety of the surface.
Budgeting this project, I found it helpful to set three cost tiers: essential, nice-to-have, and optional upgrades. The essential tier covers the pad surface, the water delivery system, and basic drainage. It’s possible to stay around six hundred dollars if you shop thoughtfully and reuse components where appropriate. The nice-to-have tier adds features like a recirculation pump, a more elaborate layout of spray heads, and a collapsible shade option. Optional upgrades include a central fountain feature, color-changing LED lighting for evening sessions, and a more sophisticated filtration strategy that keeps water crystal clear with minimal chemical input. The core objective, though, remains simple: give children a safe, accessible space to get wet, laugh, and play for as long as their energy lasts.
Over time I’ve also learned the value of modularity. The pad can be expanded or reduced by swapping in extra tiles or a different drainage route. A modular system makes it follow this link more feasible to relocate the splash area as the yard matures or as your family grows. It’s the same mindset that makes a well-planned outdoor kitchen scalable or a garden bed adaptable. Savings aren't only in the initial buy; they show up in the ability to adjust the setup without tearing apart the entire arrangement.
Installing a splash pad at home isn’t about conquering a difficult construction project. It’s about shaping a corner of your outdoor space into a place that invites collaboration, shared laughter, and moments of relief from the heat. It’s about giving kids a place to experiment with movement and water without fear of heavy machinery or complicated maintenance. It’s about making a space that feels like it belongs to the family, with the kind of practical, hands-on character that comes from doing the work yourself.
In the end, the value comes from the hours spent building, testing, and adjusting, not from naming exactly how many gallons of water flow through the pipes in a minute. The payoff is in the way the pad becomes a familiar part of daily life and how it stands up to the long, sunny days of summer. It becomes the place where you, your partner, and the kids share stories about school, friends, and tiny victories—like managing to ride a spray line across the pad without losing balance, or finding the exact moment when a spray head delivers the perfect mist for a quick cool-down after a long bike ride.
If you’re weighing whether to take on a DIY splash pad this season, the answer is yes, with a caveat. Plan for a measured, flexible setup, start with the simplest possible configuration that still feels complete, and keep a close eye on safety and drainage. The payoff will be a living room-sized corner of the outdoors that feels like a real water park but with your own fingerprints on every step. The kids will tell you with their breathless chatter and bright faces that this is exactly the kind of space they needed.
As you move toward the finish line, you’ll notice a quiet shift in your approach to outdoor spaces. The project stops being about a thing and starts becoming about a routine. Cleaning after a long session becomes a small ritual that signals the end of play and the return to ordinary life. The pad remains ready for the next heat wave, a silent hero in the background, waiting for the moment when the hose is turned on and the first spray arc crosses the yard.
And when that moment arrives, you’ll be reminded of something that’s easy to forget amid the bustle of family life. The simplest joys are often the best: a little water, a bit of sun, and a place where laughter rings a little louder for a while. It’s a reminder that the practical and the playful don’t have to live in separate corners of the house. They can share the same space, and in that shared space, families grow together, one splash at a time.
46 Zorn Blvd suite a, Yaphank, NY 11980 United States